
With Form Pilot for Mac, you will be able to fill in form on your Mac computer instead of using a typewriter. Simply open your form on the screen and fill in form fields. After you have completed your form input, you can save it to your hard drive or print it out for mailing.
| Version | Download | Order* |
| Form Pilot Pro for Mac – For filling forms professionally. Basic features for filling out any paper forms. |
Form Pilot Pro for Mac 3.12.0 (17.6 Mb)
|
99.95 EUR |
| Form Pilot for Mac – For filling forms from time to time. A lite version for filling out one-page paper forms. |
Form Pilot for Mac 3.12.0 (17.6 Mb)
|
29.99 EUR |
! PLEASE NOTE THAT THE PROGRAM IS PROVIDED "AS IS", WITHOUT WARRANTY OF ANY KIND. NO UPGRADES ARE PLANNED. NO TECHNICAL SUPPORT IS PROVIDED. BEFORE BUYING THE PROGRAM, CHECK ITS OPERATION AND MAKE SURE THAT IT SUITS YOU COMPLETELY.
* Use the bought version forever / no subscription required. Your registration code will be emailed to you as soon as your order is processed (if you didn’t receive the email, please check your spam folder).
System requirements
- Apple Mac OS X 10.7 “Lion”, Cocoa (64-bit) and later
- Mouse
- Printer
- Scanner (optional)
- Supported graphic file formats: bmp, cur, dds, gif, icns, ico, jp2, jpeg, jpg, mng, pbm, pgm, png, ppm, svg, svgz, tga, tif, tiff, wbmp, webp, xbm, xpm.
Limitations of the trial version
Two strings are printed at the top of the page.
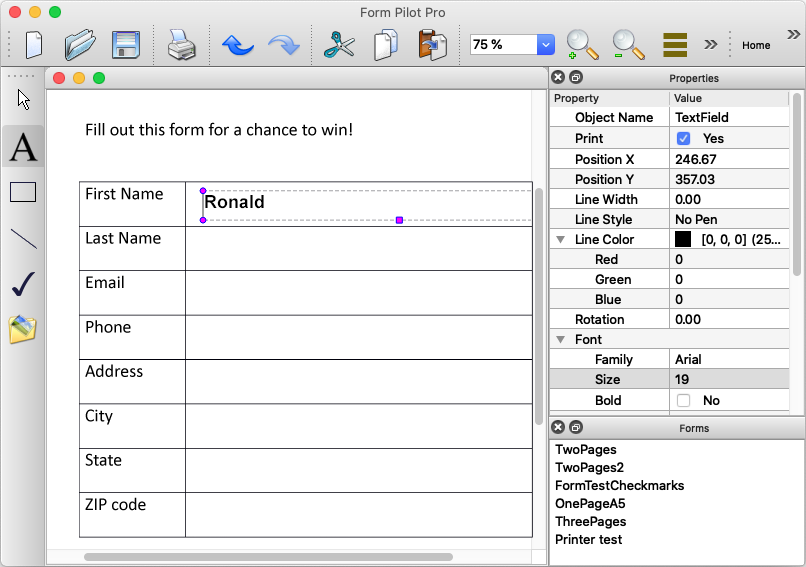
Filling in the paper form – getting started
- Scan the form using the scanner program and save the image file on your computer.
- Run Form Pilot; go to «File | Open» at the main menu. In the Open dialog that appears, choose the file with your form image. A new document with your form image will be created in the program window.
- Choose the Text Field tool and create the text fields by clicking on the desired area of the form image.
- In the Properties panel on the right in the program window, you can change font, font size, and other text font properties.
- Enter text into the created text fields.
- Insert an original paper form in your printer, then choose the command «File | Print» . In the Print Options dialog, choose the option “Print using a pre-printed form.” In this case, only the entered text of the text field will be printed. When the option is unmarked, you can print the entire document on blank paper.
Versions History
November 26 2020 :: Version 3.12.0
* Image resizing algorithm has been fixed.