
- While trying to remove the red eye from an image I ended up with a gray mask over the face that I can’t get rid of.
- I want to pick the final color of the eyes. How do I do it?
- What is eyedropper and how do you use it?
- What’s the difference between the “Formula One”, “Formula Two” and “Formula Three” buttons?
- How can I choose the color of eyes after correction?
- Does Pet Eye Pilot save EXIF data?
- The red (blue, yellow, green) border around the eye has remained after eye correction. Is it at all possible to remove it completely?
- I’ve moved the “Area Size” slider to extreme left position but the selection still covers other parts of the face.
- What’s the difference between the “Area size” and “Remove border” tools?
- Is there any way to manually adjust the selected region?
- The image shrinks after conversion in spite of the file size being set to maximum [100%].
- I can’t save the corrected image no matter what I do.
- While trying to remove the red eye from an image I ended up with a gray mask over the face that I can’t get rid of.
The gray mask over the face may have appeared because the selection covered other parts of the face in addition to the eye area. Please move the “Area Size” slider to the left until only the red eye area is selected:
Maximum area size: Reduced area size: 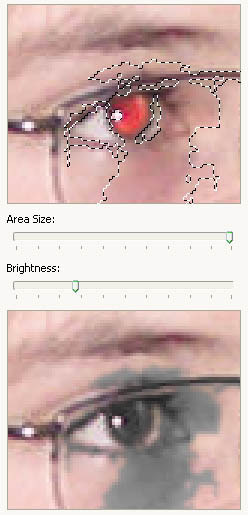
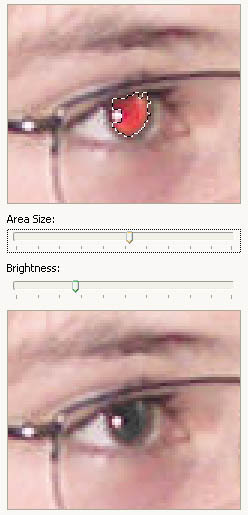
If you minimized the area size, but the selection still covers other parts of the face, click the “Scale” button
 . This will increase the slider range and you can move it further to the left. Check the result of the selection in the upper window of the Eye Correction Panel.
- I want to pick the final color of the eyes. How do I do it?
You can use the “Eyedropper” tool from the main panel. You just place it into any place on a photo and it will show you RGB color of any particular point.
- What is eyedropper and how do you use it?
Eyedropper shows you the exact RGB value of any color on the screen (underneath your cursor). You can see the value in the left bottom corner of Pet Eye Pilot:

- What’s the difference between the “Formula One”,”Formula Two” and “Formula Three” buttons?
These buttons allow you to choose one of three algorithms of color correction.
Generally, “Formula One” gives good results to correct fluorescent eyes (that have no color).
“Formula Two” has a success in most cases to correct animal eyes with some extraneous unnatural color. Try applying both algorithms to determine which of them is better for correction of the image.
“Formula Three” allows you to correct mis-colored animal eyes when neither “Formula One” nor “Formula Two” worked for you. For example, it gives good results in the cases you need to correct pink colored eyes or you have some group photo when there are eyes of small size.
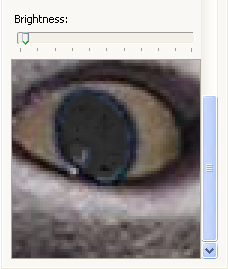
- How can I choose the color of eyes after correction?
You can only change the brightness of the correction area using the “Brightness” slider:

- Does Pet Eye Pilot save EXIF data?
Yes, Pet Eye Pilot saves EXIF data after image correction.
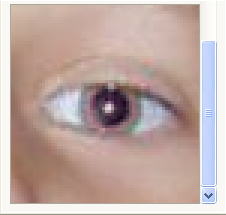
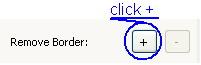
- The red (blue, yellow, green) border around the eye has remained after eye correction. Is it at all possible to remove it completely?
Please use the “Remove Border” tool in this case. This tool changes the correction area equally in all directions. Use the tool to increase the area size until the colored border disappears:

- I’ve moved the “Area Size” slider to extreme left position but the selection still covers other parts of the face.
This happens when the skin (hair, if it’s an animal) around the eye has the same tinge as the eye color you’re trying to correct. Please click the “Scale” button . This will increase the slider range and you can move it further to the left.
- What’s the difference between the “Area size” and “Remove border” tools?
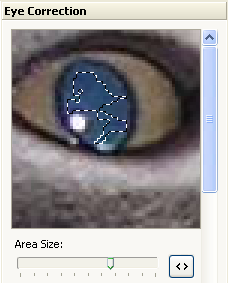
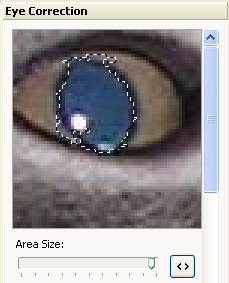
The “Remove border” tool changes the correction area equally in all directions.
When you move the “Area Size” slider, the program increases/decreases the correction area also; but in so doing surrounding pixels may or may not be included into the correction area depending on their color:

- Is there any way to manually adjust the selected region without using the slider, such as dragging the outlines with the cursor to either increase or decrease the size/shape of the outline?
Currently there is no way to adjust the outlined region manually. However, we will do our best to provide the possibility of manual adjustment of correction area in some later version.
- The .JPG image I have uploaded from a digital camera shrinks after conversion in spite of the file size being set to maximum [100%] Why?
This is the specification of JPEG format compression, it loses some information despite the quality setting you choose while saving, therefore the size of the graphic file decreases.
- I can’t save the corrected image no matter what I do.
This is a limitation of the trial version. The registered version allows you to save the corrected image.