
Home Download Pricing FAQ Manual Tutorials Known issues News
1. Install All Necessary Software
Microsoft Visual Studio Community 2013 Version 12.0.40629.00 Update 5 *
You can download it from the Microsoft site:
https://go.microsoft.com/fwlink/?LinkId=532496&type=ISO&clcid=0x409
Download vs2013.5_ce_enu.iso file and install the software.
Microsoft Visual Studio Community 2015 Version 14.0.25431.01 Update 3 *
You can download it from the Microsoft site:
https://go.microsoft.com/fwlink/?LinkId=615448&clcid=0x409
Download the vs2015.3.com_enu.iso file and install the software.
* Sometimes Microsoft changes the licensing terms and versions of Visual Studio, and the links provided may cease to work. In such case, look for another distribution of Visual Studio 2013 and Visual Studio 2015, or contact Microsoft for technical support.
Windows Driver Kit (WDK) 7600
You can download it from the Microsoft site:
https://www.microsoft.com/en-us/download/details.aspx?id=11800
Download the grmwdk_en_7600_1.iso file and install the kit.
WiX Toolset v3.11
You can download it here: https://wixtoolset.org/releases/
Download the wix311.exe file and install the software.
NSIS 3.06.1
You can download it here: https://nsis.sourceforge.io/Main_Page
Download the nsis-3.08-setup.exe file and install the software.
Electronic Signature Software
If you are planning to sign your program with a certificate, you will also need electronic signature software; furthermore, you will require programs to support your certificate.
2. Extract the archive
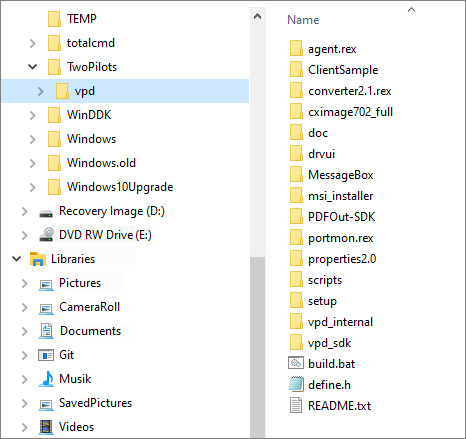
Create folder C:\TwoPilots\vpd. Extract the source code archive into this folder:
3. Follow the instructions described in README.txt
In the vpd folder, you will find the README.txt file, where the project buildprocess is described:
Build process:
1) Copy ./scripts/define.h to the root directory.
2) Update ./define.h
a) Replace all **** with the printer name and registry settings, registry settings can be different than the printer name.
b) Replace all *** with the file prefix.
c) Comment on all unnecessary features such as _PNG, _BMP, etc.
d) Update the company info in the CUSTOMER, CUSTOMER_URL, BUTTON_TEXT
3) Copy ./scripts/build.bat to the root directory.
4) Update ./build.bat
a) Update PREFIX variable with the value from the 2b.
5) Create two directories ./Files and ./Files_x64
6) Run build.bat
7) After the end of the building, all files will be placed in Files and Files_x64 directories.
Let’s consider the entire process from start to finish.
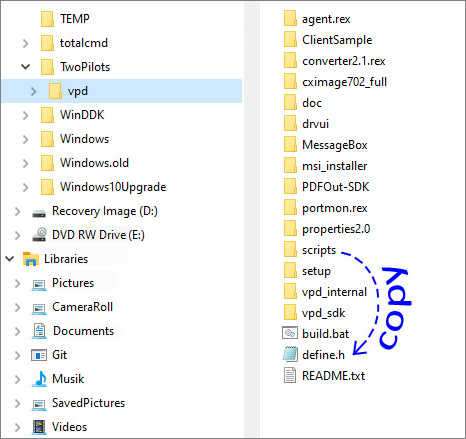
1) Copy ./scripts/define.h to the root directory.
define.h is a settings or general project constants file. Copy it from the scripts folder to the root folder – vpd (there is already a define.h file there for reference – for the demo printer assembly, you can save it elsewhere).
2) Update ./define.h
a) Replace all **** with the printer name and registry settings, registry settings can be different than the printer name.
b) Replace all *** with the file prefix.
c) Comment on all unnecessary features such as _PNG, _BMP, etc.
d) Update the company info in the CUSTOMER, CUSTOMER_URL, BUTTON_TEXT
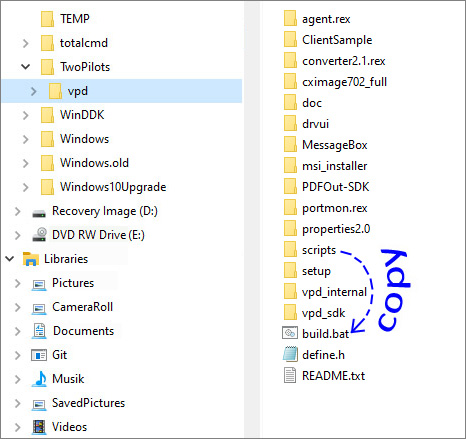
3) Copy ./scripts/build.bat to the root directory (there is already a build.bat file there for reference – for the demo printer assembly, you can save it elsewhere).
4) Update ./build.bat
a) Update PREFIX variable with the value from the 2b – replace *** with the prefix.
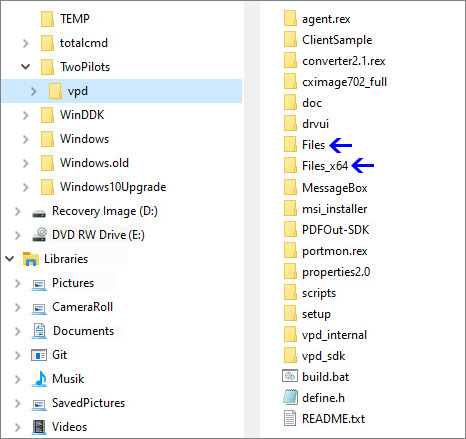
5) Create two directories ./Files and ./Files_x64
6) Run build.bat
The window for executing the project’s batch build file will open.
7) After the end of the building, all files will be placed in Files and Files_x64 directories.
See also:
- How to make the MSI-package of Virtual Printer Driver
- How to make the EXE-package of Virtual Printer Driver
Home Download Pricing FAQ Manual Tutorials Known issues News